Blog
Nail Foil
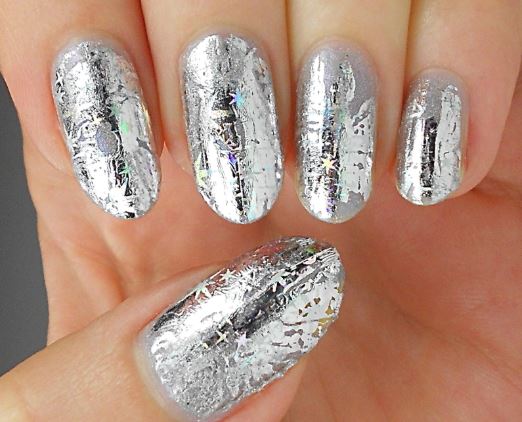
Doing your own nail art at home is easier than you might think, especially if you’re considering using nail foils — a quick and simple technique for creating nail art. Use foils to transfer instant design to your whole nail, apply them only to specific areas, or use them to create your own designs. Using nail foils is a quick and easy way to get funky with your manicure.
Step 1
Soak a cotton ball or swab in non-acetone nail polish remover. Wipe it over your nails, repeating as necessary to remove old nail polish.
Step 2
Sketch your design on paper before getting started. This is particularly important if you’re using the foil to add flowers, zigzags or other shapes to your nail.
Step 3
Cut the foil into strips that are large enough to cover your design or your entire nail. For example, cut two or three foils into strips to make stripes. Sketch your designs onto the pieces of foil, and cut out the designs.
Step 4
Dip the nail polish brush in the base-coat polish of your choice. Place the tip of the brush in the center of the base of your nail, by your cuticle. Smooth the brush straight up from your cuticle to the tip of your fingernail. Dip the brush back into the polish, if needed, and fill in each side of the nail, working from base to tip. Repeat with each nail.
Step 5
Allow the first coat of polish to dry for two minutes before applying a second coat of nail polish in the same manner. Let that dry for another two minutes.
Step 6
Dip a nail brush in foil adhesive, and paint a very thin, even layer of adhesive on the area of the nail where you intend to apply the foil. If you’re covering the entire nail as a wrap, apply the adhesive to the whole nail. Otherwise, only place it in the area where you’re adding the design, whether it’s at the tips, off to one side, or in the center of your nail. If the foil you are using is self-adhesive, skip this step and peel off the backing of the foil that you want to adhere to the nail.
Step 7
Place the nail foil on your nail once the adhesive is clear and tacky. Most nail foils should be applied with the face-side facing down or with the shiny side facing up.
Step 8
Hold the nail foil in place for a few seconds, and then rub firmly over the surface of the foil with a cotton swap or fingertip. If you’re using the foil as a wrap to cover the entire nail, smoothing it is particularly important to prevent any wrinkles in the foil.
Step 9
Brush a layer of top coat or finishing sealer on your nails to seal the foil in place. Let your fingernails dry for 15 minutes before touching them lightly to see if they are dry. Wait another 25 minutes before doing any activity with your hands.

